
[C#] .NET WorkerService Docker Container HEALTHCHECK 방법
- C#
- 2023. 1. 26. 21:54

개요
- .NET WorkerService Docker Container HEALTHCHECK 방법에 대해서 정리 진행합니다.
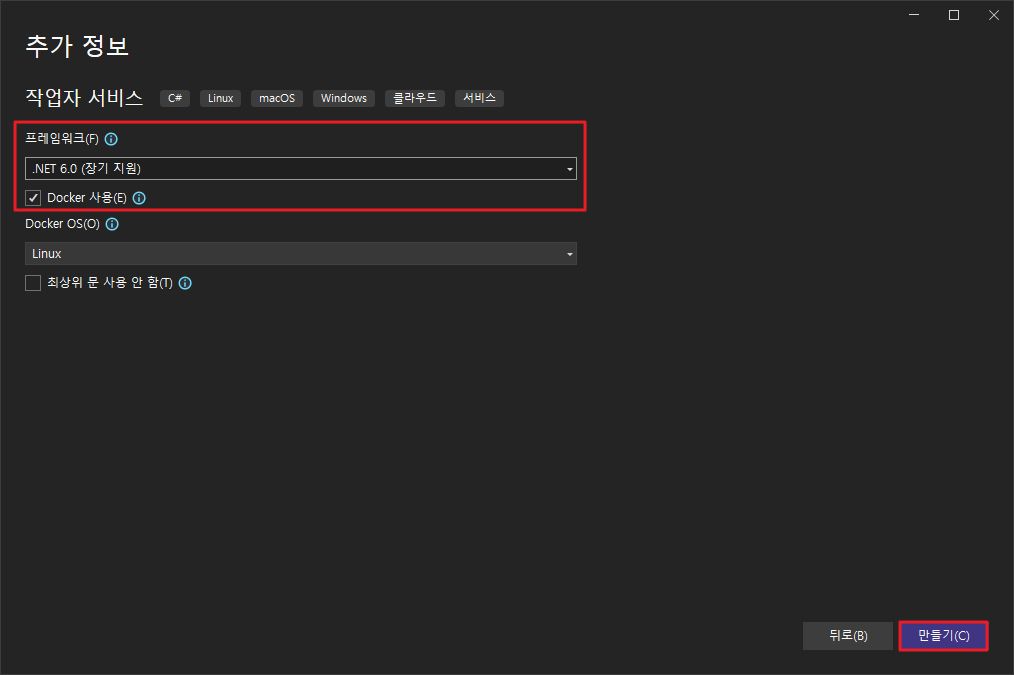
개발환경
- 테스트 개발 환경은 다음과 같습니다.
- Visual Studio 2022
- .NET 6
- WorkerService 프로젝트
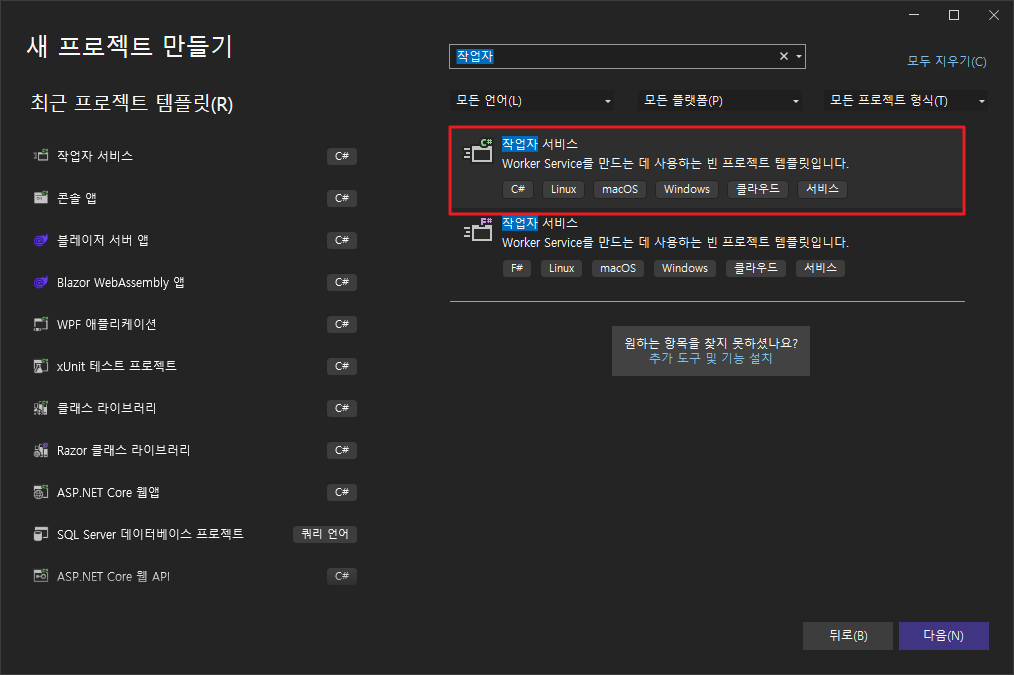
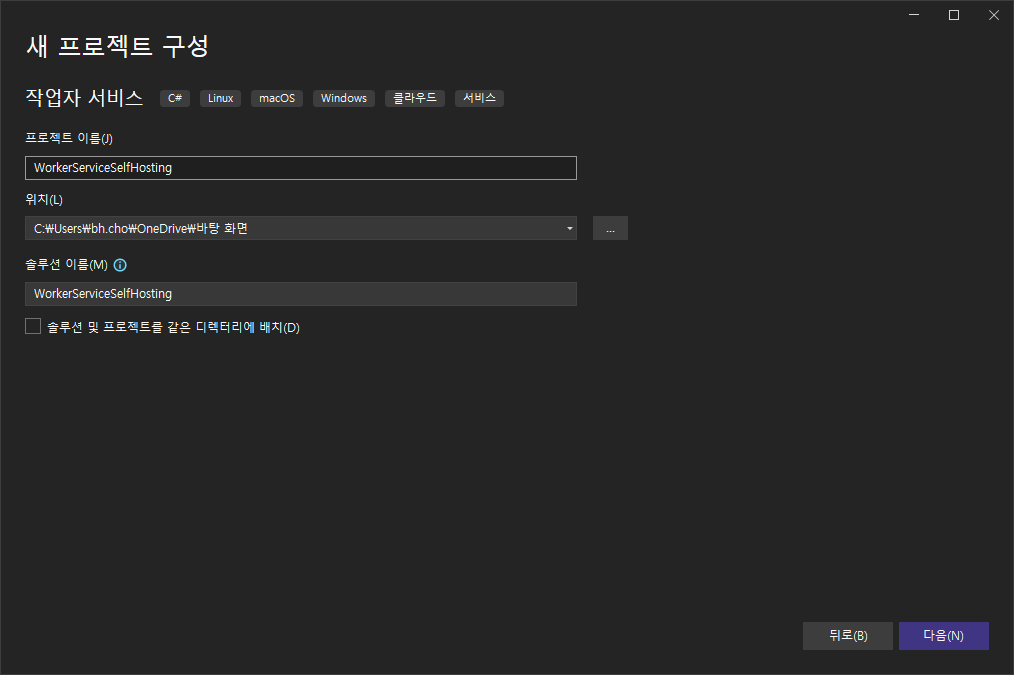
1. WorkerService 프로젝트 생성
- 제일 먼저, WorkerService 프로젝트를 생성해줍니다.
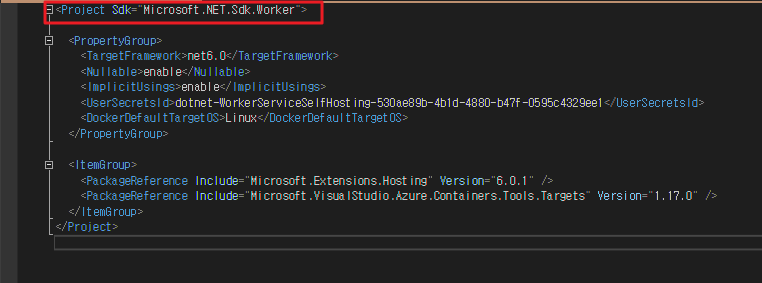
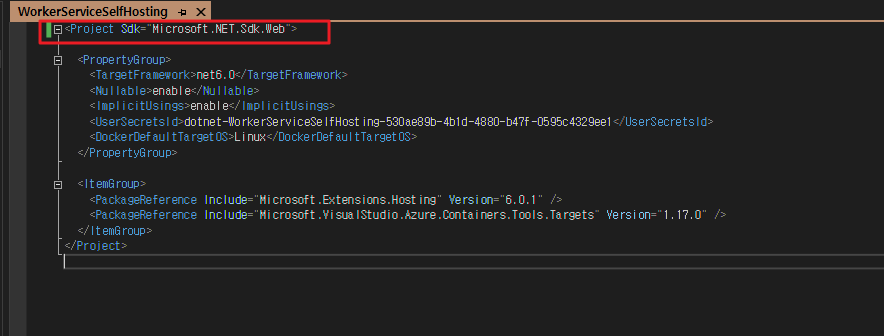
2. WorkerService.csproj 프로젝트 수정
- 본인이 생성한
WorkerService.csproj를 열고, Project 속성을Microsoft.Net.Sdk.Worker->Microsoft.Net.Sdk.Web으로 수정합니다.
수정 전
수정 후
프로젝트 다시 로드
Microsoft.Net.Sdk.Web수정하고 나면, 다음과 같이 프로젝트를 다시 로드하라는 메시지가 나옵니다.- 프로젝트를 다시 로드해줍니다.

3. launchSetting.json 파일 수정
- 다음으로, launchSetting.json 파일을 아래와 같이 수정 진행해 줍니다.
{
    "profiles": {
        "ConsoleApp1": {
            "commandName": "Project",
            "launchBrowser": true,
            "environmentVariables": {
                "ASPNETCORE_ENVIRONMENT": "Development"
            },
            "applicationUrl": "http://localhost:5001"
        }
    }
}- 위에서
"applicationUrl": "http://localhost:5001"내용을 추가해 주었습니다. - 즉, WorkerService 가 실행 되면,
http://localhost:5001url 로 호스팅 되도록 설정해 주었습니다.
4. Startup.cs 클래스 추가 및 코드 작성
- 다음으로 Startup 클래스를 생성 후, 아래와 같이 코드를 추가해 줍니다.
namespace SelfHosting;

public class Startup
{
    public void Configure(IApplicationBuilder app, IWebHostEnvironment env)
    {
        app.UseRouting();
        app.UseEndpoints(endpoints => {
            endpoints.MapHealthChecks("/healthy");
        });
    }
}- 위에서
endpoints.MapHealthChecks("/healthy");코드를 통해 entdpoint 를 추가해 주었습니다.
5. Program.cs
- 이제 Program.cs 에 서비스를 등록해 주어야 합니다.
- 등록하는 코드는 아래와 같습니다.
using WorkerServiceSelfHosting;
IHost host = Host.CreateDefaultBuilder(args)
.ConfigureServices(services =>
{
services.AddHostedService<Worker>();
services.AddHealthChecks();
})
.ConfigureWebHostDefaults(webHost =>
{
webHost.UseStartup<Startup>();
})
.Build();
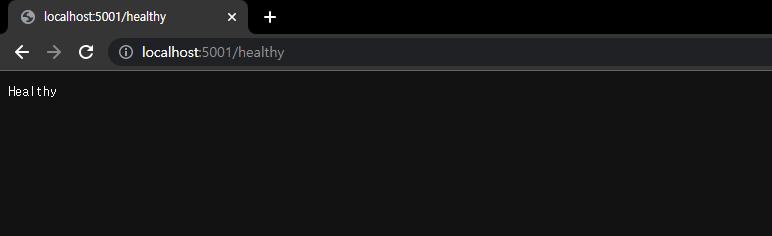
await host.RunAsync();6. 프로그램 실행 후, http://localhost:5001/healthy 접속 확인
- 이제 코드 작성은 모두 완료 되었습니다.
- 프로그램을 실행 후,
http://localhost:5001/healthy접속하여 Health 상태 확인 합니다. - 확인 결과, Health 정보가 출력되어 보이는 것을 확인할 수 있습니다.
7. Dockerfile 에 HEALTHCHECK 정보 추가
- 이제 WorkerService 내에 HealthCheck 하는 작업은 완료 되었습니다.
- 실제로, 해당 서비스를 Docker 컨테이너로 실행하기 전에 Dockerfile 에 HEALTHCHECK 옵션을 추가해 주어야 합니다.
- 실제 추가해 주어야 하는 옵션은 아래 3가지 입니다.
RUN apt-get update
RUN apt-get --yes install curl
HEALTHCHECK --interval=5s --timeout=10s --retries=3 CMD curl --silent --fail http://localhost/healthy || exit 1- 위 옵션에서 핵심 부분은
HEALTHCHECK --interval=5s --timeout=10s --retries=3 CMD curl --silent --fail http://localhost/healthy || exit 1입니다. - 위 명령어는 5초 간격으로
http://localhost/healthyURL 에 요청을 날려, 응답이 없으면 exit 1 을 반환하고 응답이 오면 exit 0 이 오면서 health 정보를 체크하는 옵션입니다. - 전체 Dockerfile 내용은 아래와 같습니다.
#See https://aka.ms/containerfastmode to understand how Visual Studio uses this Dockerfile to build your images for faster debugging.

FROM mcr.microsoft.com/dotnet/aspnet:6.0 AS base
WORKDIR /app

FROM mcr.microsoft.com/dotnet/sdk:6.0 AS build
WORKDIR /src
COPY ["SelfHosting/SelfHosting.csproj", "SelfHosting/"]
RUN dotnet restore "SelfHosting/SelfHosting.csproj"
COPY . .
WORKDIR "/src/SelfHosting"
RUN dotnet build "SelfHosting.csproj" -c Release -o /app/build

FROM build AS publish
RUN dotnet publish "SelfHosting.csproj" -c Release -o /app/publish /p:UseAppHost=false

FROM base AS final
WORKDIR /app
RUN apt-get update
RUN apt-get --yes install curl
HEALTHCHECK --interval=5s --timeout=10s --retries=3 CMD curl --silent --fail http://localhost/healthy || exit 1
COPY --from=publish /app/publish .
ENTRYPOINT ["dotnet", "SelfHosting.dll"]
8. Docker 이미지 빌드
- 앞서 작성한 Dockerfile 을 빌드하여 이미지를 생성해 줍니다.
> docker build -t test_net -f .\WorkerServiceSelfHosting\Dockerfile .9. Docker Container 실행
- 이미지를 생성하였다면, Docker 컨테이너를 실행해 줍니다.
> docker run -it --name health_test test_net10. Docker 컨테이너 상태 확인
- 이제 health 정보가 표시되는지 확인합니다.
docker ps -a명령어를 통해 확인 가능합니다.- 확인 결과, Status 정보에서 Health 정보가 정상적으로 표시되는 것을 확인할 수 있습니다.

728x90
'C#' 카테고리의 다른 글
| [C#] 종속성 반전(IoC) 이란? (0) | 2023.02.24 |
|---|---|
| [C# 팁] C# Dictionary 팁과 활용 (0) | 2023.02.14 |
| [C#] Console Porject Web API Project 변환하기 (0) | 2023.01.26 |
| [C#] .NET6 WorkerService Serilog 사용하기 (0) | 2023.01.26 |
| [C# .NET Core] EFCore PostgreSQL CodeFirst 예제 (0) | 2022.11.29 |


